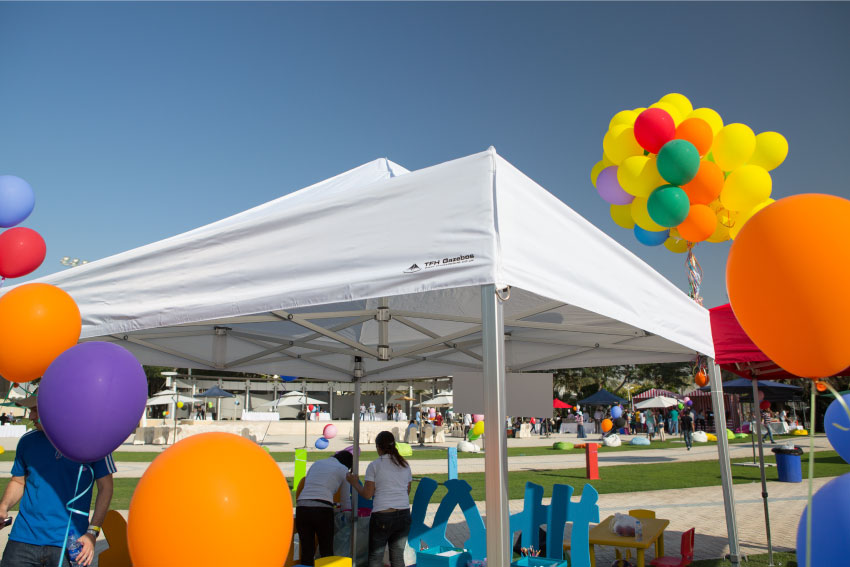
How To Put Up A Pop up Gazebo
Posted by Anastasia Borowski on 7th Sep 2023
Putting up and taking down your pop-up gazebo is a simple and straightforward process. We always advise that at least two people work together in order to assemble the pop-up gazebo.
Items Needed To Set Up Your Pop Up Gazebo
To ensure your gazebo is correctly and safely put up, you will require all parts provided in your package:
- The gazebo frame
- The gazebo roof cover
- Stakes to secure the structure onto soft ground
- Gazebo leg weights or sandbags to keep your tent grounded on hard standings
- Any additional gazebo side panels or walls you need
Once you’re confident you have everything you need, you’ll be ready to set up.
How To Put Up Your Pop Up Gazebo
Step One: Unpackage and position your gazebo
Start by taking your pop-up gazebo package to its desired location - this will keep all the parts together and ready to use. Remove all components from the packaging, separating the gazebo frame first.
Ensuring the ground is as level as possible, position the gazebo frame in the centre of the location. With one person at opposite ends, gently pull apart the frame, extending it to about half way.
Step Two: Canopy placement
Place the roof cover over the gazebo frame. Line the four corners of your canopy with the four corners of the frame; once in place, attach them to the velcro at the top of the gazebo legs.
Continue to pull the frame’s legs outwards until all of the four corner legs are locked in position and the canopy is completely stretched. You now should have assembled it to a height where you can stand inside and align the centre of the roof canopy (found on the internal peak of the roof cover) with the frame’s centre pole.
Step Three: Extending the structure
In the middle of the roof perimeter framework are velcro straps which need to be placed around the gazebo roof bars to further secure the canopy.
Now your roof is secure, you can begin to extend your structure vertically. Inside the metal legs you will find an internal leg which needs to be released by either pulling the ring pull or pressing the button on the middle leg bracket.
Lock the leg into one of five holes to reach your desired height. If you intend on adding side walls, we suggest using a lower setting at first to allow you to easily attach the panels, after which you can further extend the legs.
Step Four: Adding side walls
We recommend adding the back wall panel first. Starting at a top hand corner, vertically align the velcro strips, making sure the top edge of the wall meets the inside strip of the canopy valance.
We advise to take time on this process to make sure there is no extensive pressure on the joining zips. The gazebo walls have been designed to fit tightly around the frame to ensure there is minimal movement.
Step Five: Securing the structure
Securing your pop-up gazebo is an essential part of your setup - especially in more challenging weather conditions.
For use on soft ground such as grass, we recommend using stakes to secure your gazebo. Place the stake through the holes in the footplate of the gazebo and push or hammer it as deeply as you can into the ground.
For use on hard ground or during adverse weather conditions, we suggest using heavy leg weights or sandbags to keep your gazebo grounded to the floor.
For both weighted and staked methods, you need to ensure the legs are correctly aligned so that your gazebo stands upright and straight.
How To Take Down Your Pop Up Gazebo
This process is a reversal of the construction process, so now you have had some experience, this should be relatively simple to complete.
Step One: Clear your space
Remove anything obstructing your access around or under the gazebo so you can safely begin taking down the structure. You’ll want to remove any decorations, such as bunting or posters, too.
Step Two: Unsecure the structure
Remove any weights, sandbags, and stakes used to hold and secure the gazebo.
Step Three: Remove the roof bar velcro straps
Go inside the roof of the gazebo and remove the velcro straps from the gazebo roof bars, this is important in order to avoid damaging the canopy.
Step Four: Lower the gazebo
Lower the gazebo by releasing the leg extender brackets- this is done by pulling the pull-pin or pushing the button which will allow you to slide each leg completely down.
Step Five: Collapse the frame
Release the slider brackets found at the top of each corner leg so that the structure is no longer locked into place. With two people standing on opposite sides of the gazebo, collapse the gazebo frame down by holding the gazebo roof bars, lifting the frame slightly off the ground pushing the frame inwards while walking towards each other until the gazebo frame has closed in on itself.
Step Five: Remove and dry the canopy
Remove the canopy, allow it to dry and place it in the provided protective bag for safe keeping. Once this stage is completed, you will be able to squeeze all of the legs together, making the gazebo easy to store and transport.
Step Six: Pack up
The final step is to place your gazebo back into its storage bag, which you can then zip up, pick up, and put away.
5 Benefits Of Using Pop Up Gazebos
As you can see, the main benefits of a pop up gazebo is just how easy they are to put up and take down. Let’s explore five benefits of using pop up gazebos in greater detail…
- Easy Assembly & Dismantling: One of the primary advantages of pop-up gazebos is their ease of assembly and dismantling. With minimal components and a straightforward mechanism, even individuals with no prior experience can set up or take down these structures within a short period.
- Portability: Pop-up gazebos are designed to be lightweight and compact when folded. This feature makes them incredibly portable, allowing users to easily transport them to various events, markets, or gatherings without any hassle.
- Versatile Usage: These gazebos are versatile and can be used for various functions, including garden parties, outdoor markets, camping trips, or as temporary shelter for any outdoor activity. With various sizes and styles available, there is a pop-up gazebo to suit every need.
- Durable & Weather-Resistant: Made with robust materials and designed to withstand different weather conditions, pop-up gazebos offer durability and protection. The water-resistant canopy provides shelter from rain, while the sturdy frame ensures stability, even in windy conditions.
- Cost-Effective: Investing in a pop-up gazebo is cost-effective in the long run. Given their durability and multifunctional capabilities, these structures offer value for money and can be used repeatedly for different events and purposes over time.
We hope you now feel confident with how to assemble your pop-up gazebo! If you have any further questions about how our pop-up gazebos work or which model is best suited for you, head to our pop up gazebo page or alternatively, get in touch with our team today by calling 01277 350524.
Frequently Asked Questions
How do I anchor a pop-up gazebo on a windy day?
To anchor your gazebo securely, use weighted bags, sandbags, or leg weights on the legs of the structure. For extra stability, you may also use guy ropes and stake them into the ground, ensuring that the gazebo is held firmly in place during windy conditions.
Can I leave my pop-up gazebo outdoors overnight?
While pop-up gazebos are designed to be weather-resistant, it is not advisable to leave them outdoors overnight or for extended periods, especially under adverse weather conditions. Dismantling and storing the gazebo in a dry place will extend its lifespan.
Are pop-up gazebos waterproof?
All of our pop-up gazebos are 100% waterproof, allowing you to enjoy them, even when the miserable UK weather hits.
Can I use a pop-up gazebo on any surface?
Pop-up gazebos can be set up on various surfaces, including grass, pavement, decking, or sand. However, the anchoring method may differ depending on the surface. It is essential to use appropriate weights, stakes, or anchoring systems to secure the gazebo safely on different grounds.